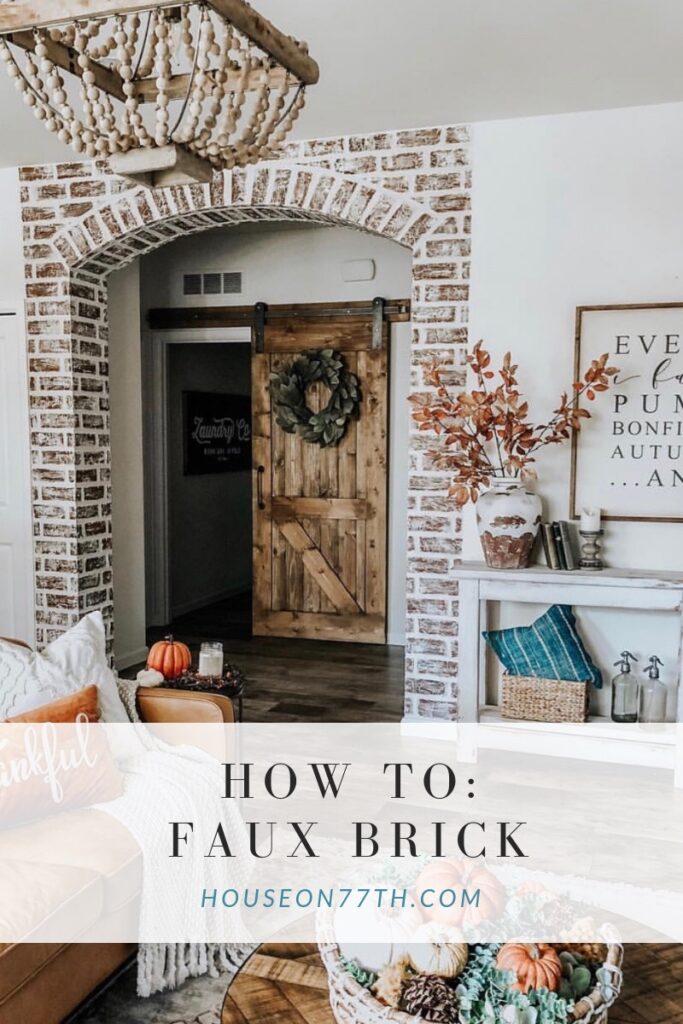
One of my most requested project tutorials is the faux brick archway that I created in our living room… and I’m finally getting around to sharing in a one stop spot for your viewing! However, if you’d rather see this in action, be sure to check out my Instagram saved story highlights section.
After the twins were born, I was craving a project and this archway in our living room was in need of some character. I had seen several examples on Instagram, including this one from Jessica at @the_rusticpallet and this one from Natalie at Vintage Porch, and just knew I had to replicate this in my own way! After watching, researching, measuring, and scheming… I got to work.
I really love how it turned out and I think this is a great project for any skill level. I’ve seen it used for archways, solid walls, and even backsplashes. Want to get started? Here’s how!
To begin you’ll need to gather the following materials:
- 1/2 inch masking tape
- Level
- Measuring tape
- Pencil
- Paper towels
This is all you’ll need for the taping portion. For the paint and texture portion you will need:
- Joint compound
- Primer
- Paint brush
- Paint for the bricks (colors are up to you!)
- Foam brushes
- Paint for the grout
- White wash paint (optional)
Once you’ve gathered your supplies, you’re ready to tape!
Begin by taping off the outer corners of your wall. Since I am working with an archway and not the entire wall, I measured to see how far I had between the inside of the wall and the pantry door, and the inside of the wall and the light switch. It just happened that they were about the same distance so I chose to put tape there as my stopping point. Then I taped off the ceiling and at the baseboards.
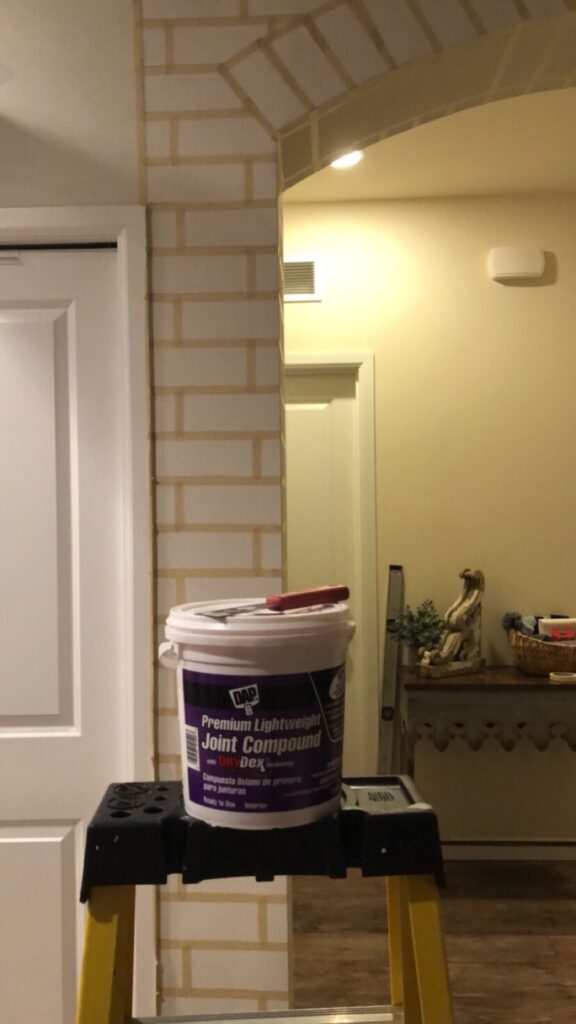
Next you will want to decide how large your bricks will be. Visually, I liked the look of a 3″x8″ brick. Now, since I am working with an archway I wanted to make sure that I left enough room for there to be one solid row of bricks at the top before my arch bricks started. In order to do this, I had to make my arch bricks a little shorter, so those ones are more like 3″x6″. It took me a few attempts to get the arch to look right visually. As you can see below, I had to add some extra spacing in areas to make sure that there were enough bricks and that it looked symetrical. It definitely isn’t perfect by any means but I think the imperfect adds even more character!
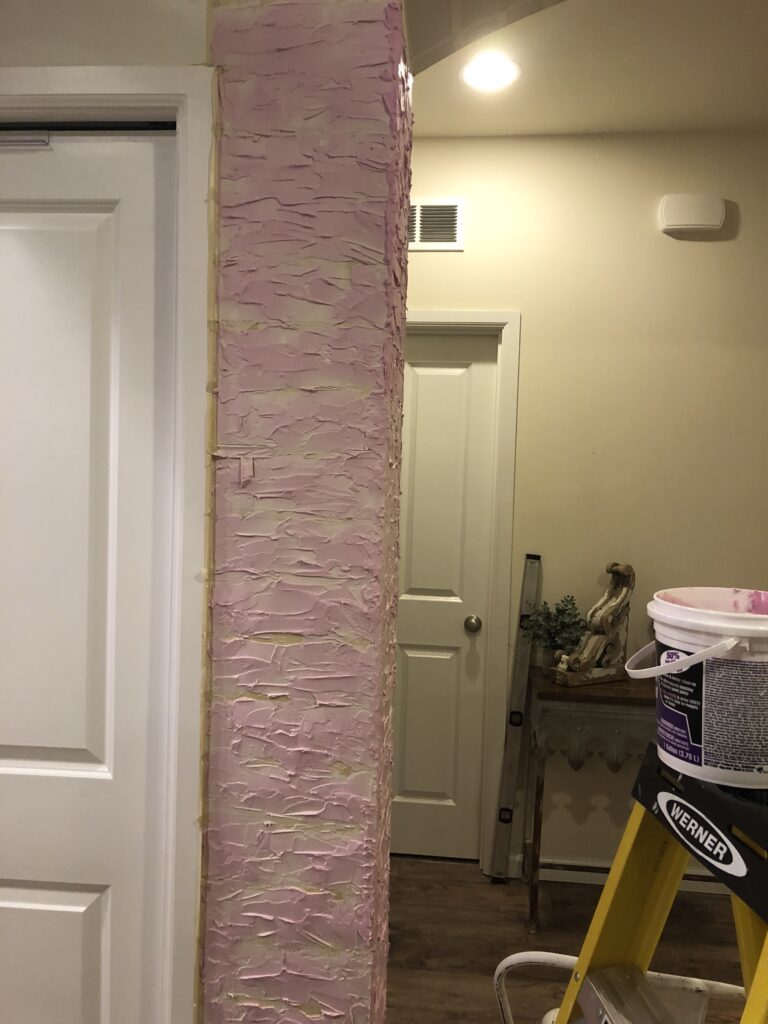
After you are done taping you are ready for your joint compound! You want to work quickly so that the joint compound doesn’t dry completely. At the time I did this project, the twins were only a few weeks old so I worked in small sections. However, if you have time on your side then you may be fine to do it all in one fell swoop. Make sure that you slap the joint compound in a thick layer as this is what is going to give your brick dimension. DO NOT worry about making it perfect! And be sure to cover your tape as the tape is going to act as your grout once you peel it off.
Once you are done wiping the joint compound on, and it is still wet, slowly and carefully peel off your tape. This part is SUPER MESSY! You have been warned lol. Make sure to have paper towels on hand and go slow. If you move too fast it will fly all over the place (trust me – been there!)
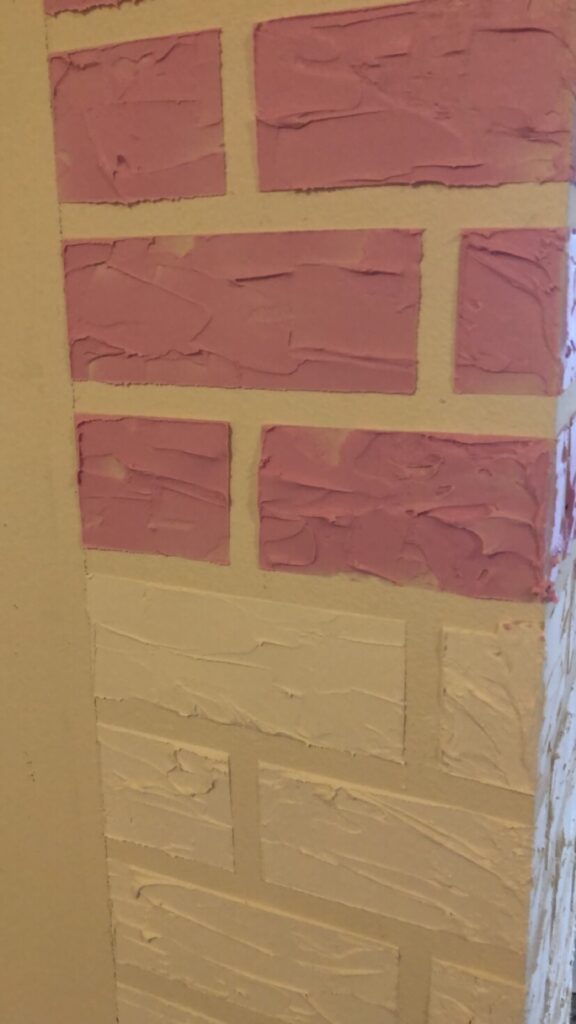
After you have peeled all the tape off you’re going to let the joint compound dry for at least 24 hours.
When the joint compound is completely dry you will apply 1-2 layers of Primer. In my case, I only needed to add one layer on the primer but it will depend on what the original color of your walls were and how well your wall grabs the paint. Allow to dry for at least 24 hours.
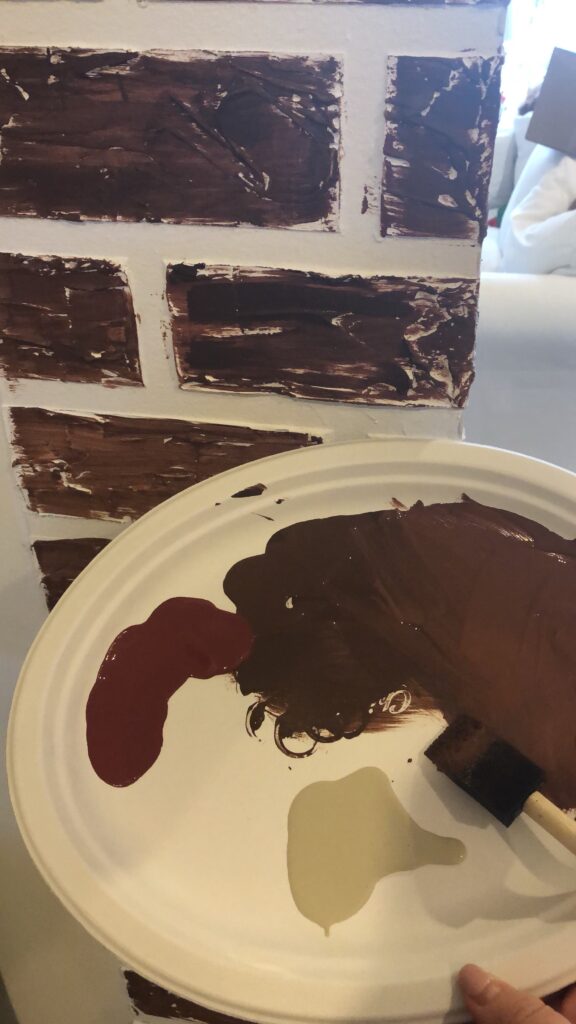
Now the fun part! Paint away! I selected 3 different shades of brown paint from the craft section at Michael’s – a dark espresso color, a regular brown, and a light taupe. I used a foam brush to stipple the color into and across each individual brick. Yes, it was a long process, but so worth it!
After I painted each individual brick, I went and painted the grout in a soft creamy gray tone. I mixed a few colors that I had on hand and lightly went in through each of the grout lines.
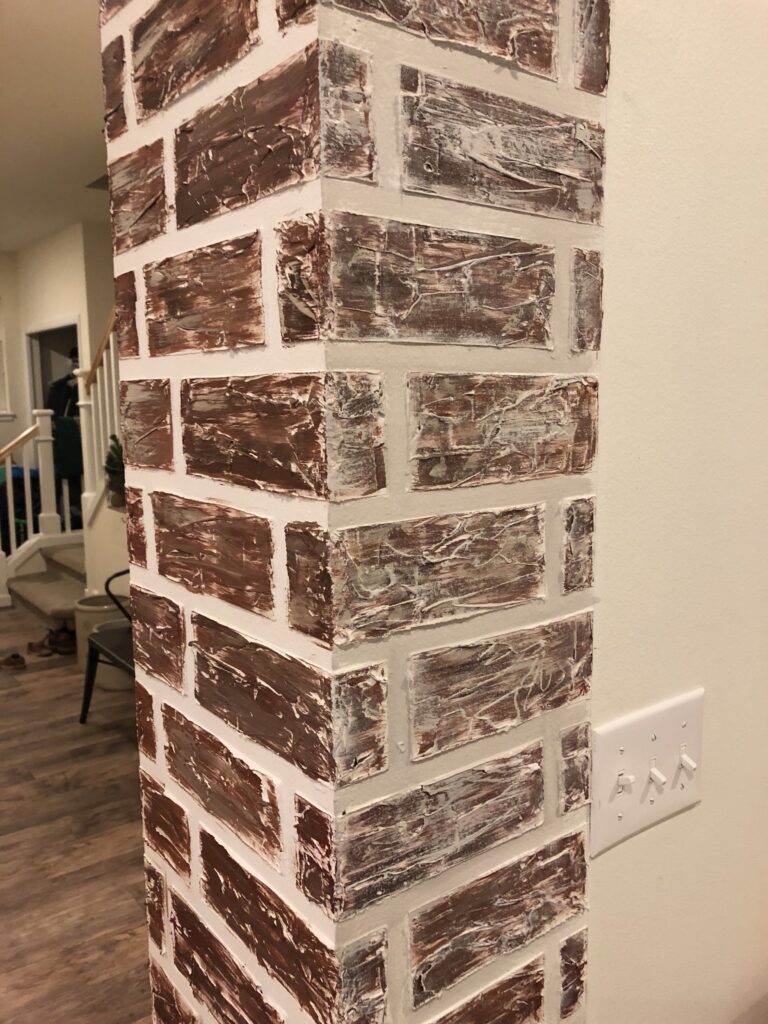
Finally, white wash! This step is optional but I do love the effect that it gives. I dabbed my paint brush into the white paint, then dabbed the excess off onto a wash cloth and lightly went over each brick. I went heavier in some areas and lighter in others. The key is to not focus on making each brick look the exact same, because if they were real brick they wouldn’t look the same anyway! And we want each to have it’s own character. Also, be sure to add some of the white wash to the grout lines!
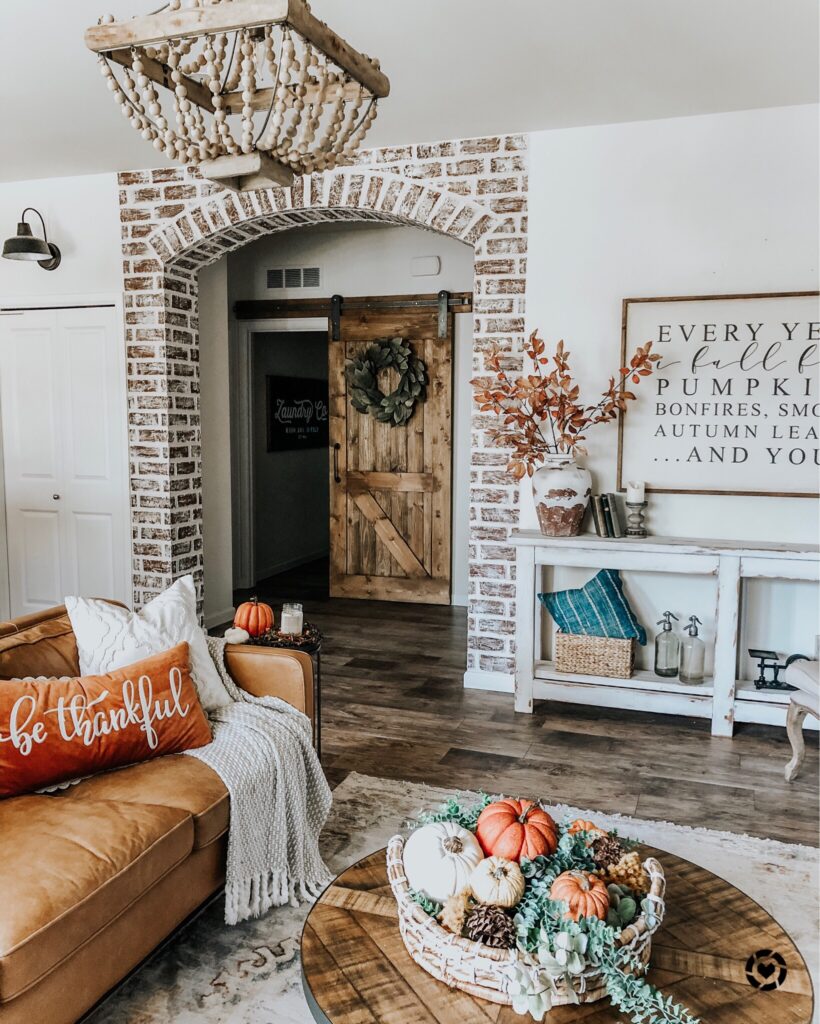
And there you have it! I love seeing how you guys have created your own faux brick walls, so please be sure to tag me or let me know if you use it in your home!

Love the brick! You are very talented. I am not sure I could do it!
Which rug is pictured in your living room?
I should like to know what the actual
Color and brands of the paint you used. I’m going to try this and paint color and can make it or break it.
I really like what you guys are up too. This kind of clever work
and exposure! Keep up the amazing works guys I’ve included you guys to blogroll.
Way cool! Some very valid points! I appreciate you writing this article and also the rest of the website is really good.
This is a great tutorial! I am so excited to do this to an arch in my house. One question, did you have trouble finding 1/2 in masking tape? I’ve looked EVERYWHERE local and no luck. Amazon is a last resort.
I found the tape at Target!
Would it have been easier to paint THEN remove the tape? I would think it would have been easier to keep the grout lines clean. Just curious. Love it!!! Going to try it.
You need to remove the tape while the joint compound is still wet, otherwise it will harden and the removal of the tape will tear the joint compound and you won’t have even rectangles anymore. So, in short, no! Don’t leave the tape up to paint. Hope that helps! 🙂
Hello! I love this and am planning to do a faux brick wall in my home as well. I am wondering how well it has held up? Does the joint compound dry hard enough to withstand wear and tear of kiddos?! Thanks in advance for your reply. 🙂
It held up great! The kiddos didn’t touch it much but it was fine when their toys banged into it 🙂